Luscious Chocolate-Peanut Butter Cups
Highlighted under: Sweet Bakes
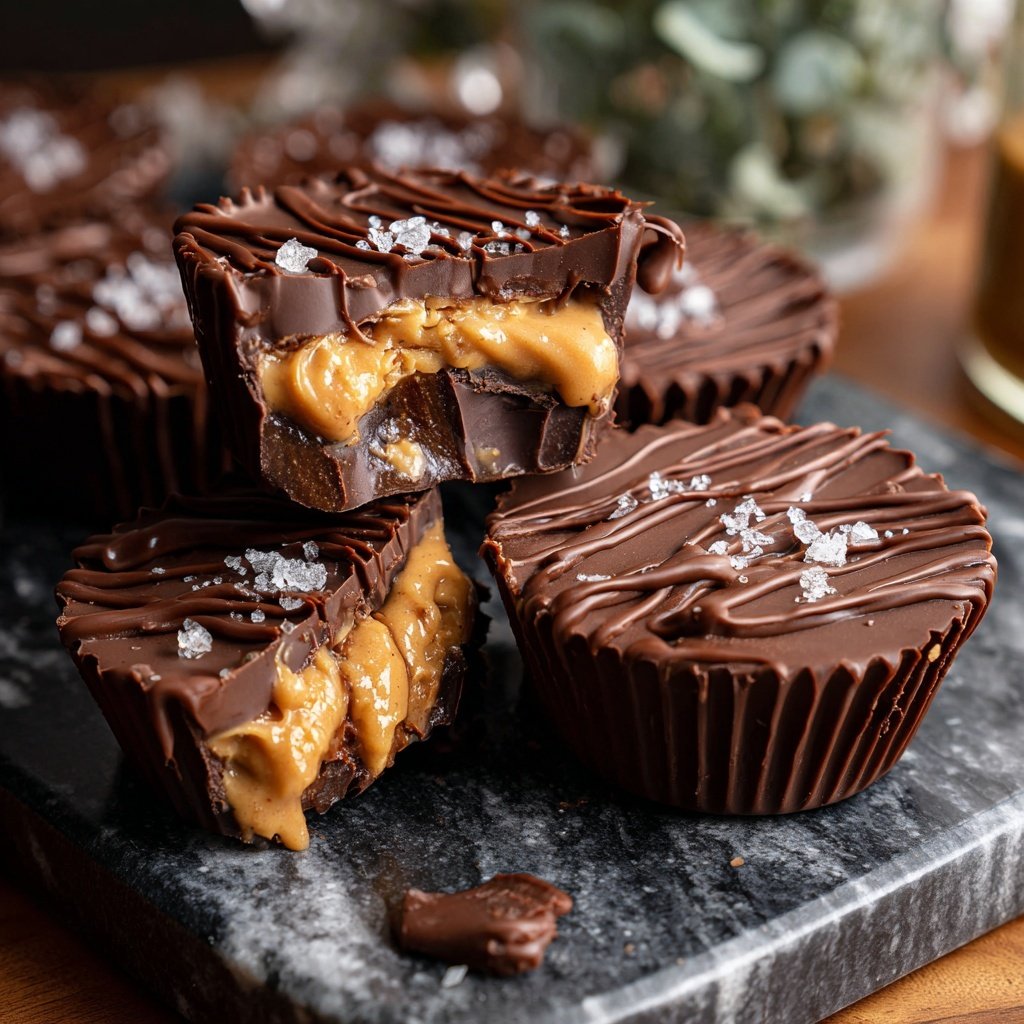
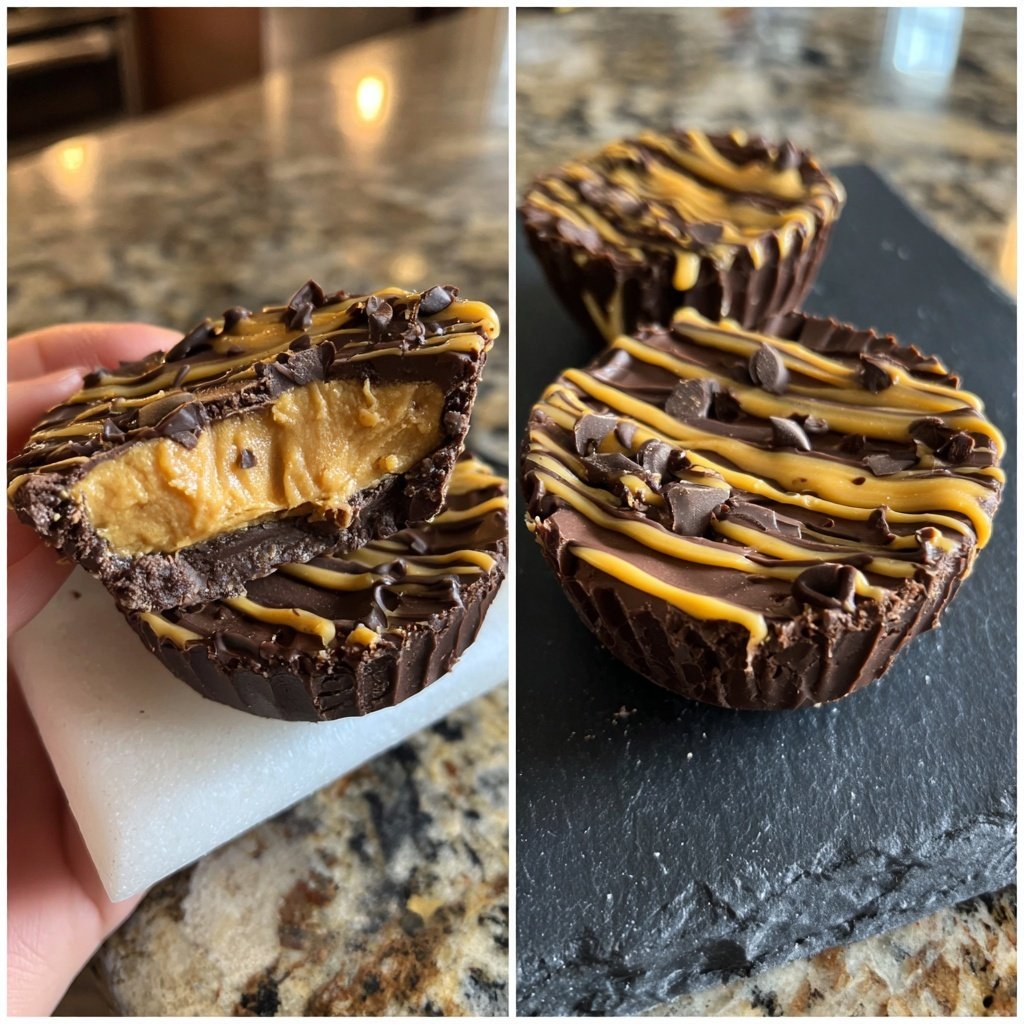
When I first made these Luscious Chocolate-Peanut Butter Cups, I couldn't believe how simple yet indulgent they were. The creamy peanut butter center perfectly contrasts with the rich chocolate coating, creating a delightful treat that's hard to resist. I love how they come together without the need for baking, making them perfect for when I want a quick and satisfying dessert. Every bite is a sweet escape that feels both special and satisfying, perfect for any occasion—or just as a treat for myself.
Making these Luscious Chocolate-Peanut Butter Cups is always a rewarding experience. The combination of creamy peanut butter and decadent dark chocolate is a match made in heaven. I remember the first time I tried adding a pinch of sea salt to the chocolate to enhance the flavors, and wow, what a difference it made!
Another tip that I’ve learned over time is to let the peanut butter layer cool before adding the chocolate coating; this helps prevent the two layers from blending. It's these little details that truly elevate a simple recipe into something extraordinary!
Why You Will Love This Recipe
- Rich chocolate flavor paired with creamy peanut butter filling
- No baking required, making it an easy dessert option
- Perfect for sharing, or keeping all to yourself!
Understanding the Ingredients
The star ingredients in this recipe are dark chocolate chips and creamy peanut butter, both of which play crucial roles in achieving the luscious texture and flavor profile. Dark chocolate provides depth and a slight bitterness that balances the sweetness of the peanut butter filling. Using chocolate chips meant for baking can make a difference in melting and molding, ensuring a smooth coating. If you prefer a sweeter treat, consider using semi-sweet chocolate chips; just be mindful of the texture when you layer them.
Creamy peanut butter is preferred for this recipe because it blends easily with the powdered sugar and vanilla. Crunchy peanut butter can be substituted for those who like a bit of texture, but be aware that it may change the mouthfeel of the final product. Similarly, natural peanut butter can be used, but ensure to stir it well before measuring, as the oil tends to separate. It’s essential to keep the ratios of peanut butter to sugar right to avoid a filling that’s too runny.
Key Techniques for Success
When melting the chocolate, using a microwave in short bursts rather than a stovetop can help prevent scalding. Stir the chocolate every 30 seconds until fully melted and glossy. If the mixture seems too thick, adding a bit more coconut oil can help achieve a smoother consistency that’s easier to work with. Always remember to let the chocolate cool slightly before pouring it into the liners, as extremely hot chocolate can melt the liners and affect the final shape of your cups.
Also, pay close attention to the filling process. When you spoon the peanut butter mixture into the chocolate bases, aim for a relatively level layer. If you overfill, the chocolate on top may not seal properly, leading to leaks when you eat them. After adding the final layer of chocolate, give the cups a gentle tap on the counter to remove air bubbles and ensure an even distribution throughout. This will contribute to a professional finish and prevent any unsightly unevenness.
Ingredients
For the Chocolate Cups
- 1 cup dark chocolate chips
- 1 tablespoon coconut oil
For the Peanut Butter Filling
- 1/2 cup creamy peanut butter
- 1/4 cup powdered sugar
- 1/4 teaspoon vanilla extract
- A pinch of salt
Make sure to use high-quality chocolate for the best results!
Instructions
Melt the Chocolate
In a microwave-safe bowl, combine the dark chocolate chips and coconut oil. Microwave in 30-second intervals, stirring in between, until fully melted and smooth.
Prepare the Cup Liners
Line a muffin tin with cupcake liners. Pour about 1 tablespoon of melted chocolate into the bottom of each liner, tilting to coat the sides slightly. Place in the freezer for about 10 minutes to set.
Make the Peanut Butter Filling
In a bowl, mix together creamy peanut butter, powdered sugar, vanilla extract, and salt until smooth and well combined. Remove the muffin tin from the freezer.
Add the Filling
Spoon about 1 tablespoon of the peanut butter mixture into the center of each chocolate-coated liner, smoothing it out evenly.
Top with More Chocolate
Cover the peanut butter layer with more melted chocolate, ensuring it’s completely sealed. Return to the freezer for another 15 minutes to set.
Serve and Enjoy
Once set, remove from the muffin tin and peel off the liners. Enjoy your Luscious Chocolate-Peanut Butter Cups!
Store any leftovers in an airtight container in the fridge.
Pro Tips
- For an extra flavor boost, try adding a sprinkle of crushed nuts on top before the final chocolate layer sets.
Storage Tips
These Chocolate-Peanut Butter Cups can be stored in an airtight container in the fridge for up to two weeks. If you want them to last even longer, consider freezing them. They can be kept in the freezer for up to three months. Just make sure to lay them on a flat surface in a single layer until set, then transfer them to a sturdy container or freezer bag to prevent them from sticking together.
When you want to enjoy them after freezing, simply transfer the desired amount to the refrigerator to thaw for a few hours. Avoid microwaving them to defrost, as that could cause the texture to change or make the chocolate overly soft. They’re best enjoyed while still slightly chilled.
Serving Suggestions
While these cups are perfect on their own, you can elevate their presentation for any occasion. Consider drizzling some melted white chocolate over the tops for added decadence and a visual twist. You could also sprinkle a pinch of sea salt on top to enhance the flavor profile, giving a delightful contrast to the sweet layers beneath.
Another fun idea is to serve these cups with fresh fruits, like strawberries or bananas, providing a fresh contrast that balances the richness of the chocolate and peanut butter. Alternatively, pair them with a scoop of vanilla ice cream for an indulgent dessert that will impress guests and satisfy your sweet tooth!
Questions About Recipes
→ Can I use milk chocolate instead of dark chocolate?
Yes, you can use milk chocolate if you prefer a sweeter taste, but it may alter the richness of the cups.
→ How long can I store these peanut butter cups?
They can be stored in an airtight container in the refrigerator for up to two weeks.
→ Can I make these vegan?
Absolutely! Just choose dairy-free chocolate chips and ensure your peanut butter is vegan-friendly.
→ What if I have nut allergies?
You can substitute the peanut butter with sunflower seed butter or any nut-free butter.
Luscious Chocolate-Peanut Butter Cups
What You'll Need
For the Chocolate Cups
- 1 cup dark chocolate chips
- 1 tablespoon coconut oil
For the Peanut Butter Filling
- 1/2 cup creamy peanut butter
- 1/4 cup powdered sugar
- 1/4 teaspoon vanilla extract
- A pinch of salt
How-To Steps
In a microwave-safe bowl, combine the dark chocolate chips and coconut oil. Microwave in 30-second intervals, stirring in between, until fully melted and smooth.
Line a muffin tin with cupcake liners. Pour about 1 tablespoon of melted chocolate into the bottom of each liner, tilting to coat the sides slightly. Place in the freezer for about 10 minutes to set.
In a bowl, mix together creamy peanut butter, powdered sugar, vanilla extract, and salt until smooth and well combined. Remove the muffin tin from the freezer.
Spoon about 1 tablespoon of the peanut butter mixture into the center of each chocolate-coated liner, smoothing it out evenly.
Cover the peanut butter layer with more melted chocolate, ensuring it’s completely sealed. Return to the freezer for another 15 minutes to set.
Once set, remove from the muffin tin and peel off the liners. Enjoy your Luscious Chocolate-Peanut Butter Cups!
Extra Tips
- For an extra flavor boost, try adding a sprinkle of crushed nuts on top before the final chocolate layer sets.
Nutritional Breakdown (Per Serving)
- Calories: 380 kcal
- Total Fat: 26g
- Saturated Fat: 15g
- Cholesterol: 195mg
- Sodium: 85mg
- Total Carbohydrates: 32g
- Dietary Fiber: 3g
- Sugars: 24g
- Protein: 6g